

How to create mockups on Figma using the Artboard studio plugin.


This article is a written explanation based on my experience using the Artboard Studio plugin to create mockups for screens I designed using Figma.
What is a mock-up?
In manufacturing and design, a mock-up is a scale or full size model of a design or device used for teaching, demonstration, design evaluations, promotions or other purposes. -Wikipedia
I have been designing interfaces for about a year plus using Figma but how did I render my screens into mockups?…
To achieve this, I downloaded various screen sizes as SVG formats or created vectors with respect to the screen size I am working on. This worked fine but was time-consuming.
Discovering/Using the Artboard plugin
With a few days to go towards the end of the year 2019, while reading some articles on Medium, I came across this article which introduced me to the plugin. Although there was a screencast at the end of the article, I didn’t watch it. This is because I prefer reading articles to watching clips. This time, the video had become more important after I had tried working with the plugins without achieving my goal.
On watching the clip, I was able to understand how to go about / using the plugin which I did and it was a success this time. But still having in mind, fellow designers out there who use Figma for their designs and might also have the same preference as I do, I decided to write out the steps taken to achieve presenting your screens into mockups using the Artboard Studio plugin.
Steps to put you through
I summarized the process to achieve this in 5 steps. Attached below each step is image(s) to show pictorial representations and add as an extra guide.
- First, go to the Figma plugins menu, and search for Artboard studio mockups, click install at the top right content of the screen to install the plugin. Or install it here
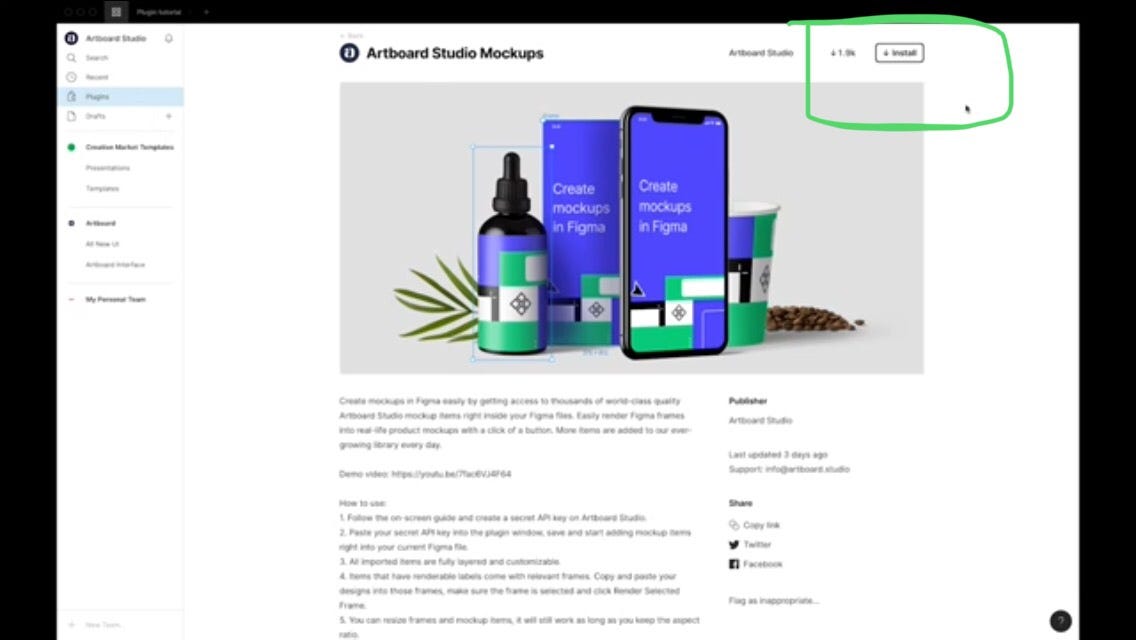
Screenshot showing how to install the Artboard plugin
2. Go to your Figma project, right click and select plugins or go to the hamburger menu at the top left corner of your screen, move your cursor to plugins, hover the cursor on Artboard mockup plugins and select add mockups.
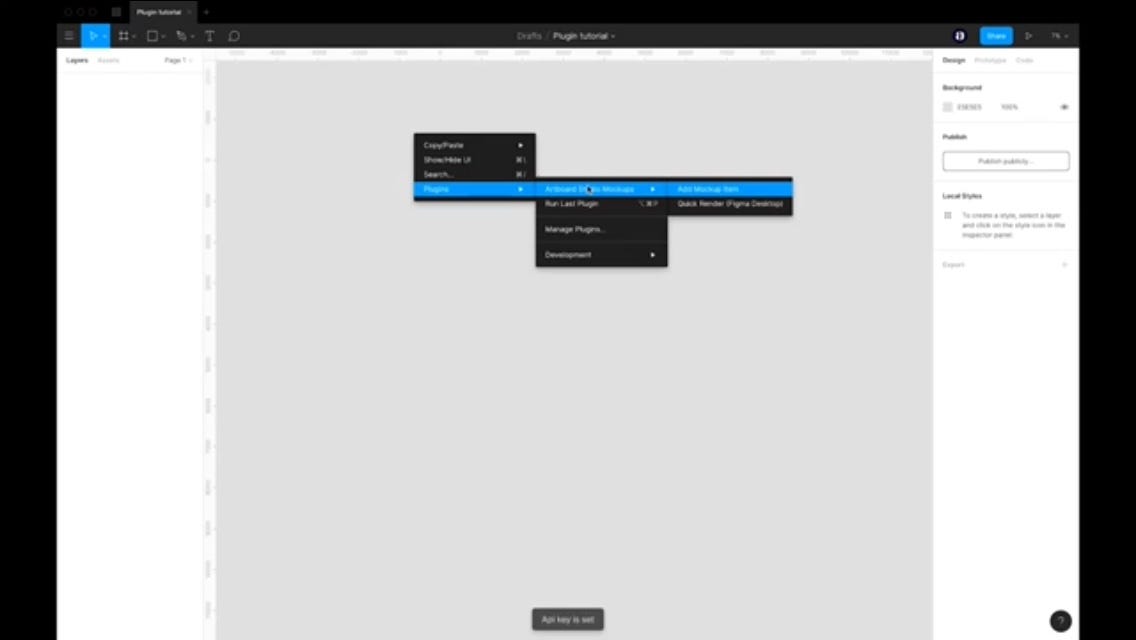
Screenshots showing how to access the Artboard studio plugin
3. A pop-up will appear on your screen requesting for a secret API key. You will have to visit the Artboard studio website, log in or create an account if you don’t have one. When that is done, go to your account settings page, generate an API key, copy it, then go back to Figma and paste the key on the required field, then click save and continue. Be informed that this key is to be kept secret as it contains your Artboard studio details.
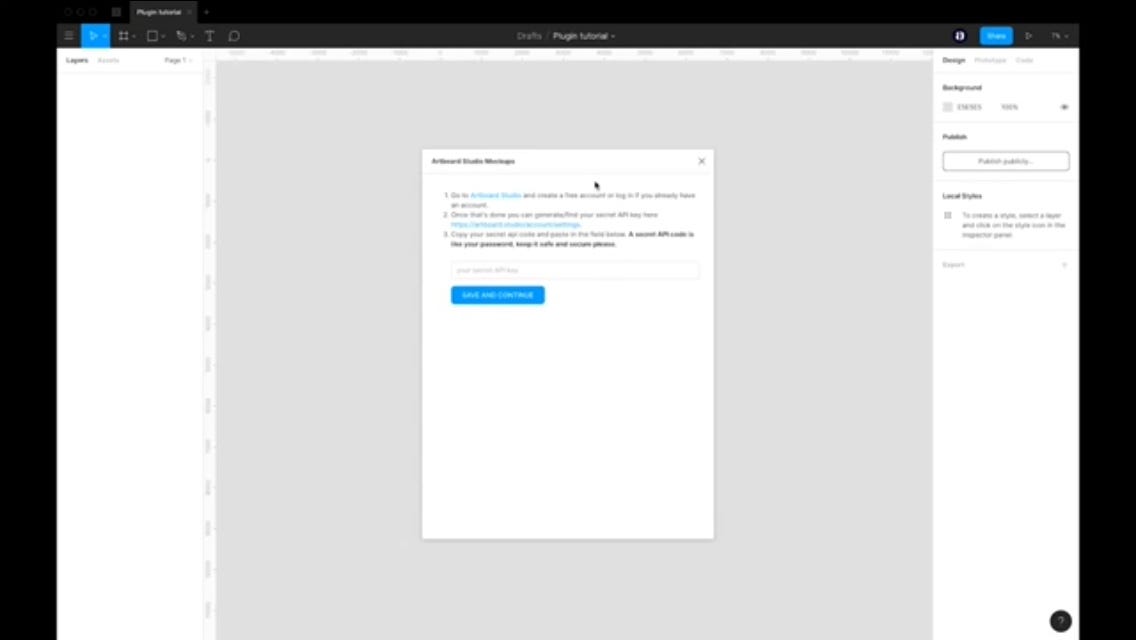
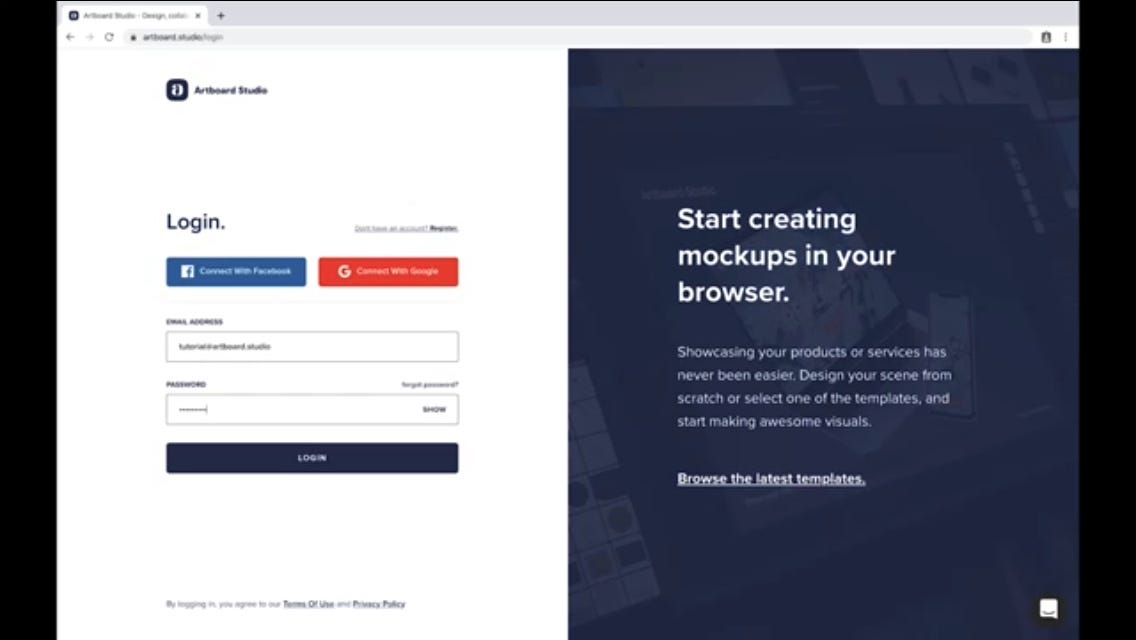
Screenshots showing the popup screen requesting for API key and Artboard studio log-in page respectively
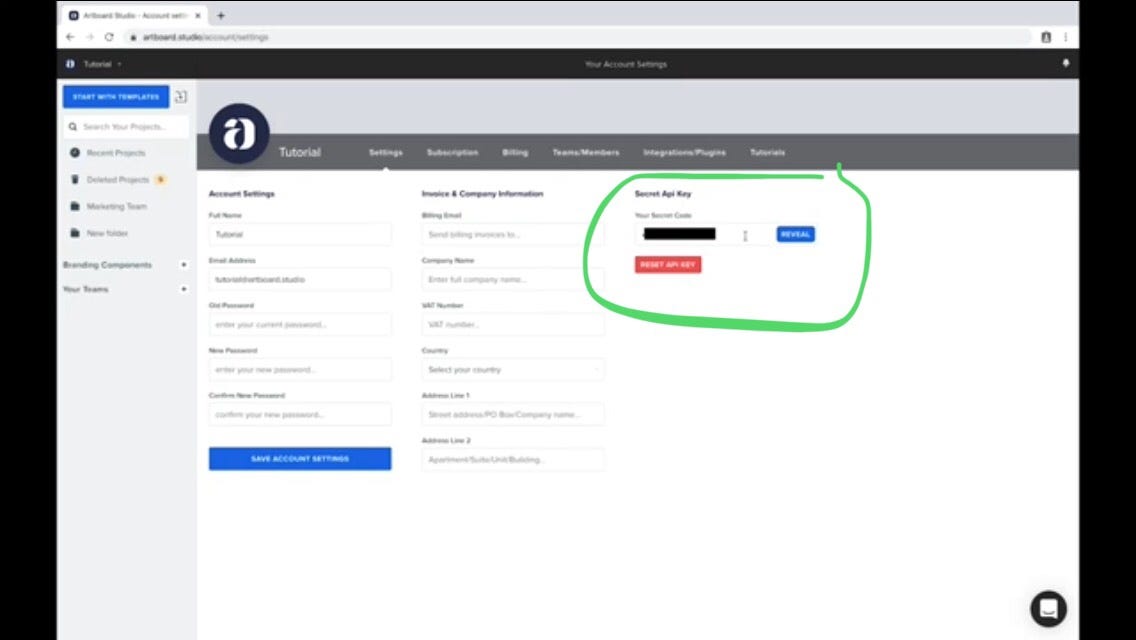
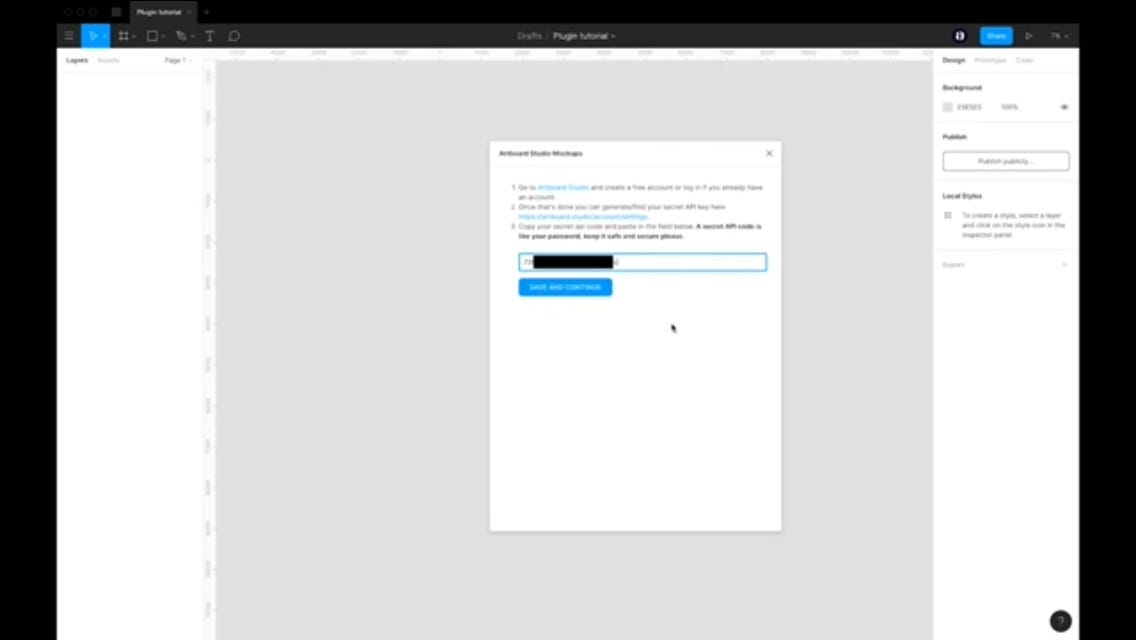
Screenshots showing where the API key is generated at the account settings page and after it has been copied and pasted respectively
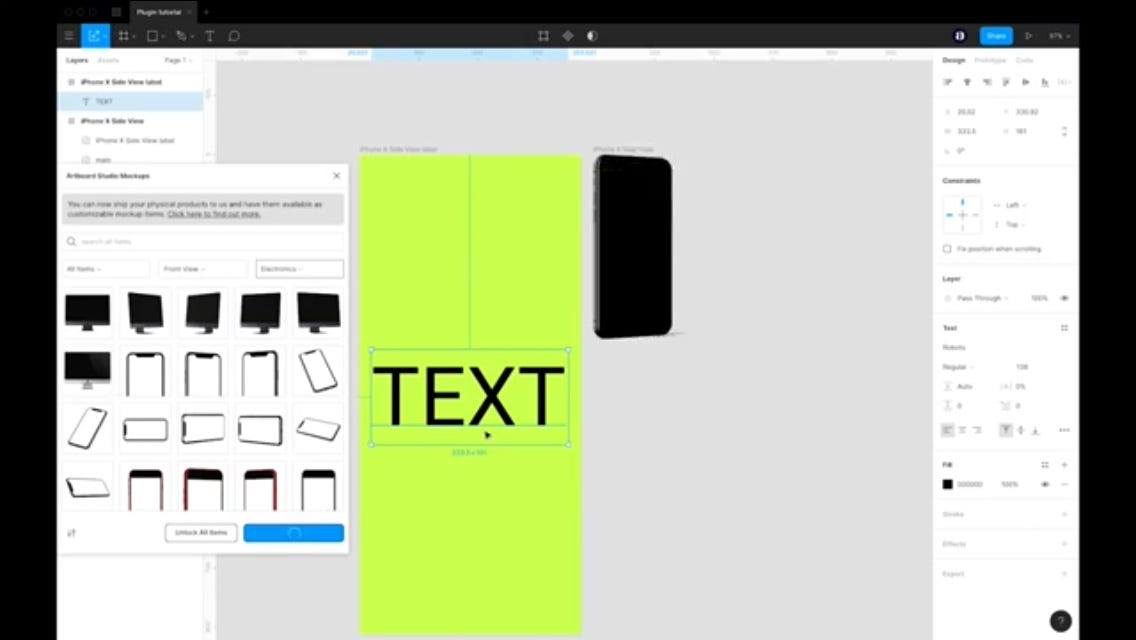
4. On clicking save and continue, a pop-up showing a list of Artboard studio mock-up items appears. Select any of the items from the pop-up you wish to use for your mockup presentation.
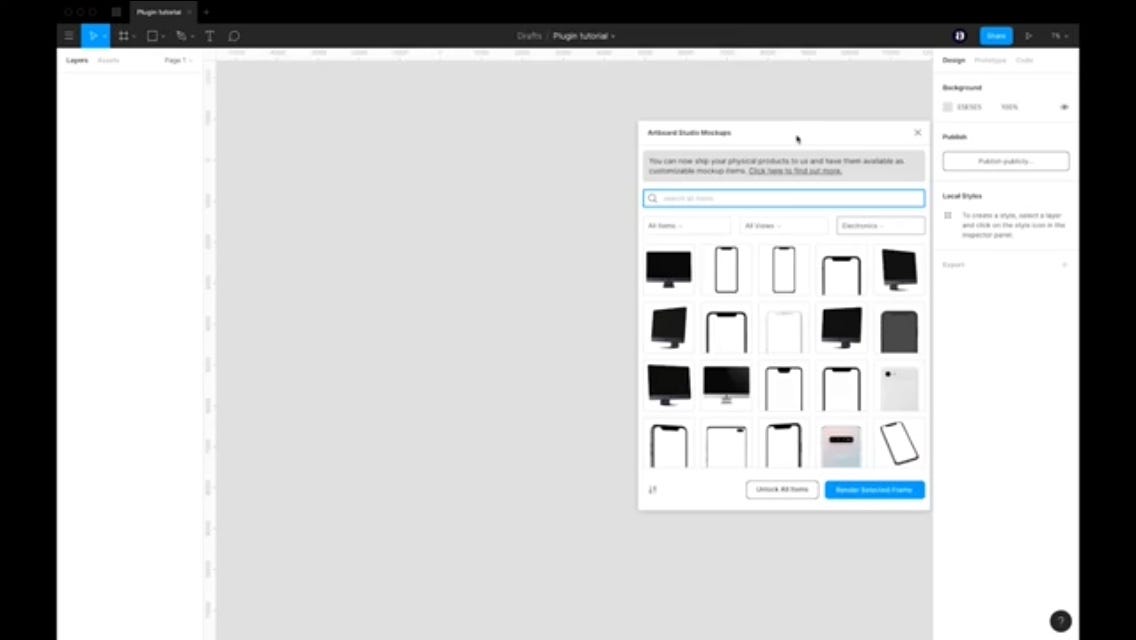
Screenshot of popup showing the different mock-up items
PS: When an item is selected and imported to the board, it comes with a frame which you need to put your design in or customize. You can’t assign your already designed frames into the mockup item, rather, withthe frame that comes with it.
5. After importing the item and customizing the frame, click the render button. Your design is going to be rendered on the item from that perspective. Any changes made on this same frame would be rendered on the item after the render button is clicked on consecutively.
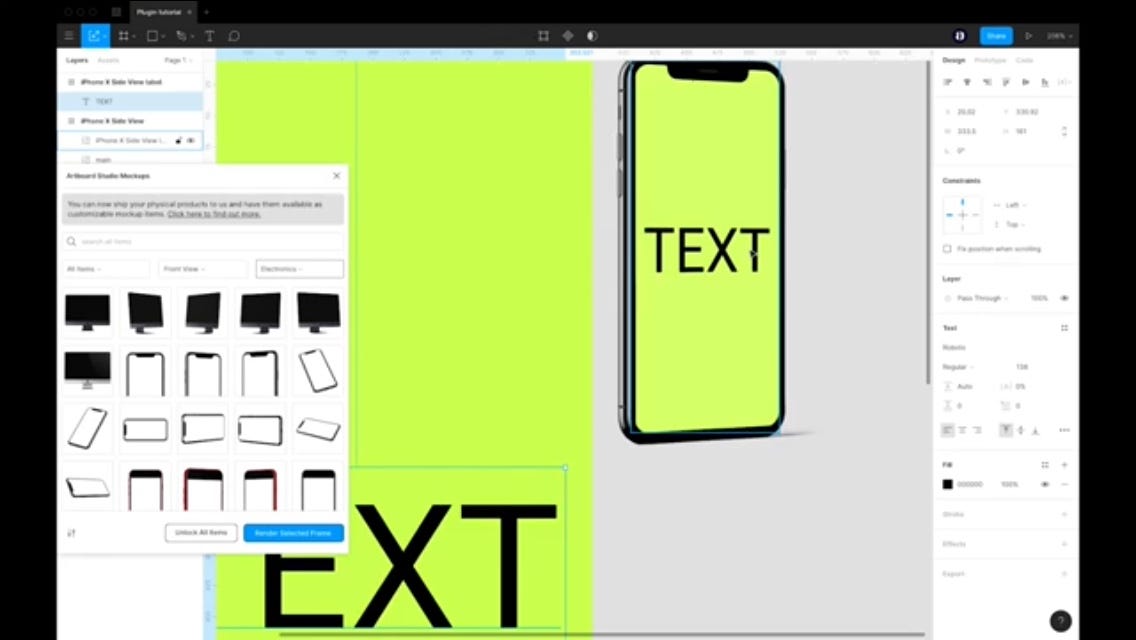
Screenshots showing how to customize or design frames that come with selected mockup item
Also, in the Artboard mockup plugin, there are other categories of items, eg: packaging, stationary etc. This implies that you can create any type of mockup inside Figma.

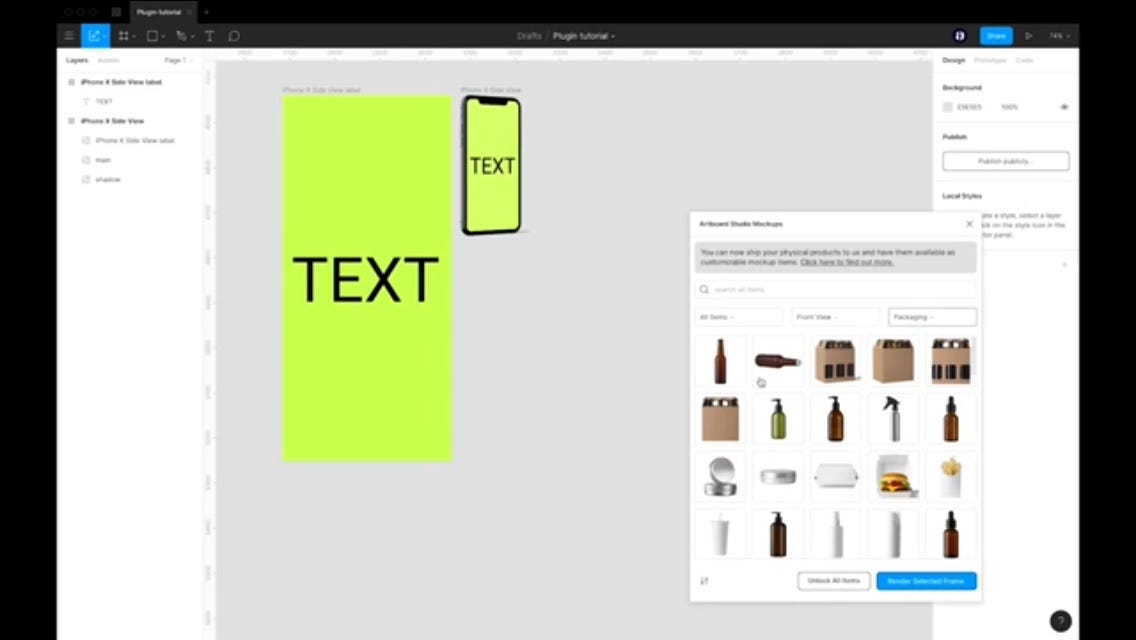
Screenshots showing other categories of mock-up items
For instance, select the packaging category and pick any item; say the first item (the bottle)… This item comes with 3 different frames which represent 3 different layers of the selected item.
It also implies that any changes made on each frame would be rendered on the item after clicking the render button.
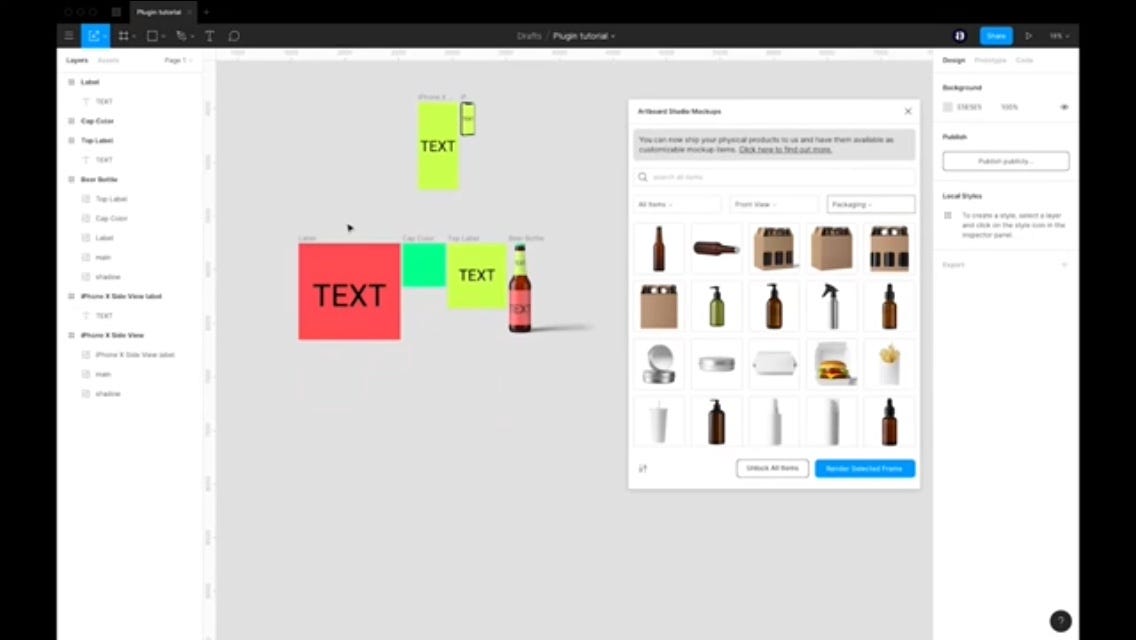
Screenshot showing how to work with mock-up items with multiple frames
Using the Artboard mockup plugin has made mockup presentations and designs easy to do conserves time and gives your design a more realistic look. Isn’t this fun? I bet it is. Also, you can visit the Artboard studio website for mockup testing, and see and try new free templates. Also, you can give back to the community by creating your own products or items and sending them to the Artboard studio to be featured on the item list.
Feel free to try the plugin anytime, any day. If you enjoyed this article or found it helpful, a few claps would be appreciated.
Comments and feedbacks are also welcome.
Thanks for reading.